Okay. This one technically doesn't involve any sort of crafting. I casually mentioned to my father that if he had a full rack of antlers he didn't want, I'd like to mount some to hold my long necklaces. He immediately offered me a skull which he had cleaned a couple years ago. 8 points and lovely.
Since all the work was already done for me, I just had to hang it. The trick is using some really long screws (3.5") and some anatomy. The supraorbital foramen is the perfect size through which to drive a mounting screw.
Measure, level, drill holes in the wall (woooo power tools!), and fix it to the wall!
The rack is irregular, so it will always look a bit uneven. Fortunately, I'm not interested in symmetry.
There it is, all bedecked in my longer jewelry. Previous to this, all of my long necklaces were hanging from a single command hook. I'm happy to have them spread out. Even happier to have an excuse to own a deer skull. Feeling very Gaston now - I use antlers in all of my decorating!
Showing posts with label jewelry. Show all posts
Monday, August 4, 2014
Monday, July 21, 2014
I Use Antlers in All of My Decorating...
I had a Gaston moment. Okay. Let's be honest. All my moments are Gaston moments where wildlife decor is concerned...

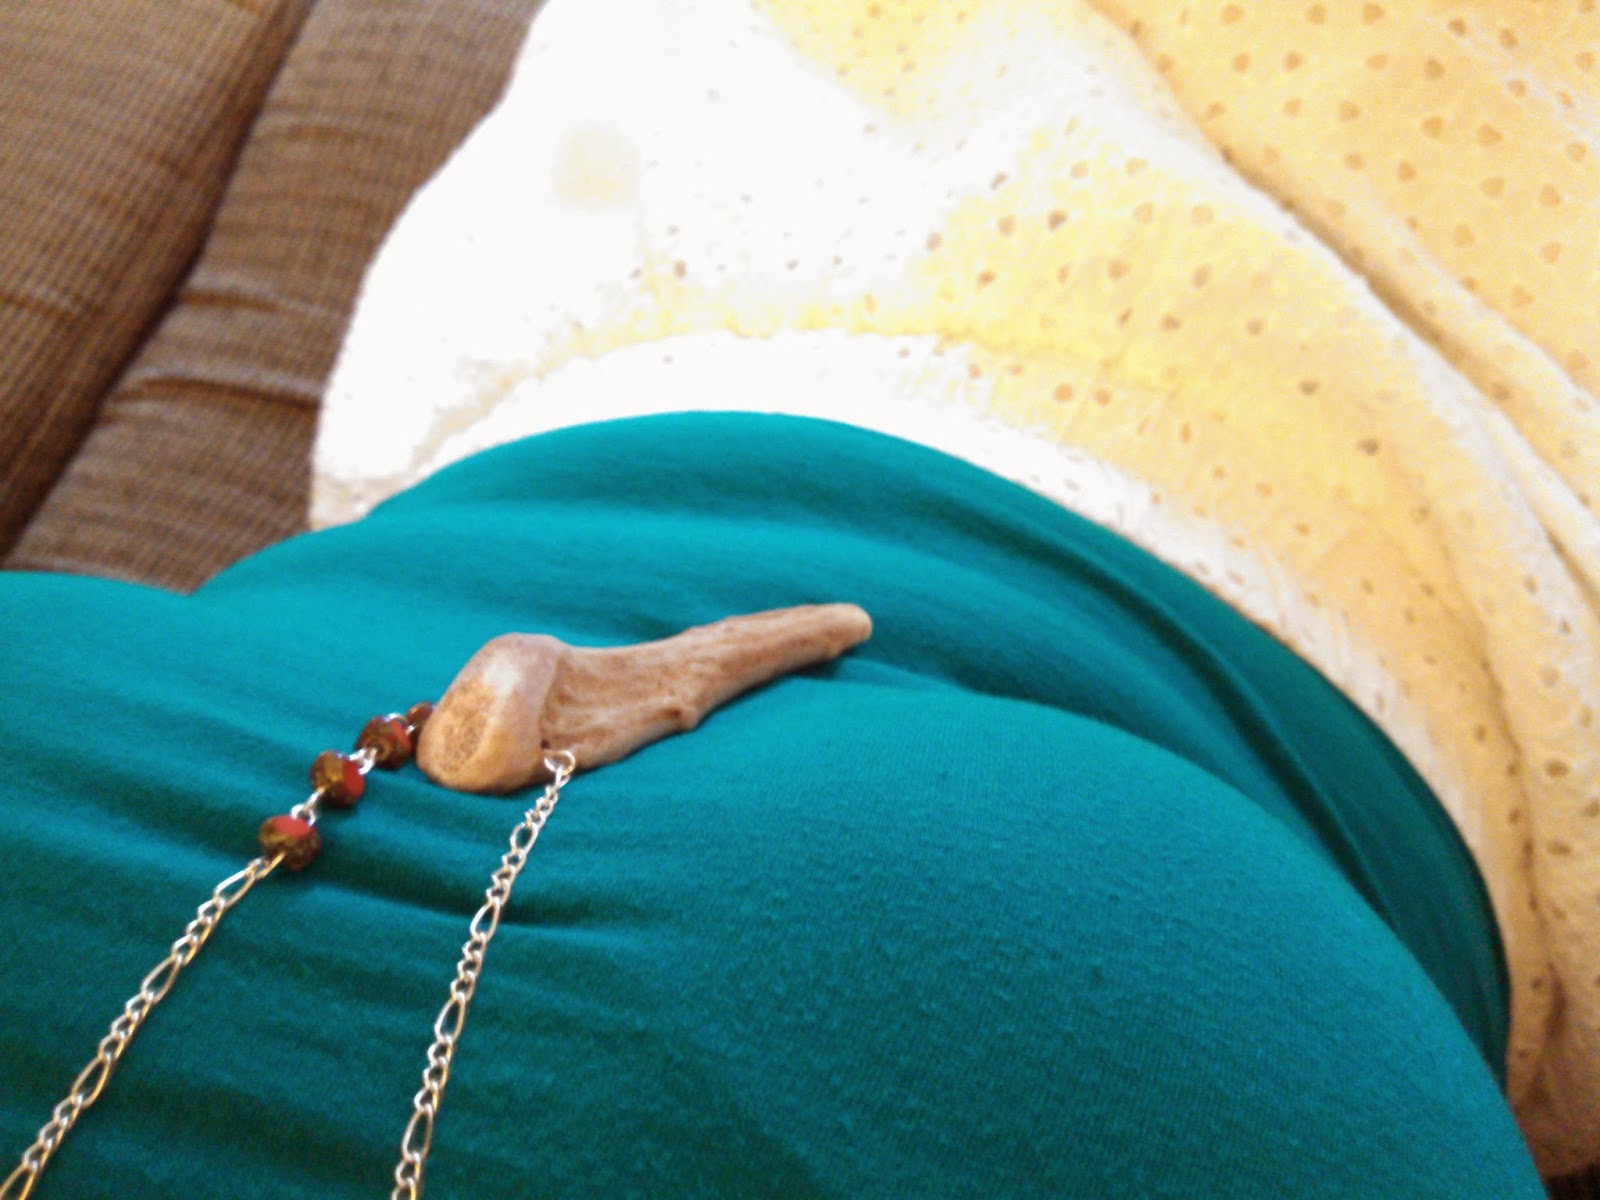
I've had this lust for antler jewelry for about a month now. I asked my dad for a tip to with which to work, but finally took matters into my own hands and purchased an antler tip marketed as a dog chew toy.
This necklace was pretty ridiculously simple to construct. I used 5 eye pins, a chain, 4 beads, and an antler tip.
Here's how it went down. I purchased my antler tip from the pet store, so I had to remove the maker's mark that had been stamped on it. The mark came right off with a little nail polish remover and elbow grease.
Then, I used a power drill to bore a hole through the thicker portion. I tried thinking of a MILLION ways to avoid drilling, but this was the easiest. In the end, I love the resulting look. And who doesn't like using power tools?
I threaded the antler with an eye pin, then trimmed the excess to form another eye on the opposite end. Before completely closing the second eye, I attached the prefabricated chain to it.
With that portion completed, I moved onto my bead work. I'll admit, I splurged on the beads and got a string of the good stuff. It's some sort of tumbled natural stone. I love the red and mottled gray/turquoise appearance.
I threaded each of the beads with eye pins, trimmed and created a second eye. Each time, I attached the next eye pin before closing the second eye. The result was a chain of beads. This could be accomplished with wire instead of pins. I was looking for fast results, so I went this route.
The last eye of the bead chain was attached to the prefabbed chain. The chain I used had a pattern of many small links with larger links sporadically interspersed. I saved one of the larger links to attach to the antler and the bead chain. This gives just a little bit more space so the beads can hang properly.
That's it! It took all of 30 minutes, and I can add on extra charms or feathers later if I find it too plain. I'm digging the simplicity for now.
Absolutely perfect! Here's the breakdown:
Antler tip: $5.78
Eye pins: $1.49
Beads: $6.79 (I used a coupon. Original price was $11.99)
Chain: $3.49
TOTAL: $17.55
If I had been more patient and less obsessed with these beads, I could have gotten away with this project for a little over $5.
I've had this lust for antler jewelry for about a month now. I asked my dad for a tip to with which to work, but finally took matters into my own hands and purchased an antler tip marketed as a dog chew toy.
This necklace was pretty ridiculously simple to construct. I used 5 eye pins, a chain, 4 beads, and an antler tip.
Here's how it went down. I purchased my antler tip from the pet store, so I had to remove the maker's mark that had been stamped on it. The mark came right off with a little nail polish remover and elbow grease.
Then, I used a power drill to bore a hole through the thicker portion. I tried thinking of a MILLION ways to avoid drilling, but this was the easiest. In the end, I love the resulting look. And who doesn't like using power tools?
I threaded the antler with an eye pin, then trimmed the excess to form another eye on the opposite end. Before completely closing the second eye, I attached the prefabricated chain to it.
With that portion completed, I moved onto my bead work. I'll admit, I splurged on the beads and got a string of the good stuff. It's some sort of tumbled natural stone. I love the red and mottled gray/turquoise appearance.
I threaded each of the beads with eye pins, trimmed and created a second eye. Each time, I attached the next eye pin before closing the second eye. The result was a chain of beads. This could be accomplished with wire instead of pins. I was looking for fast results, so I went this route.
The last eye of the bead chain was attached to the prefabbed chain. The chain I used had a pattern of many small links with larger links sporadically interspersed. I saved one of the larger links to attach to the antler and the bead chain. This gives just a little bit more space so the beads can hang properly.
That's it! It took all of 30 minutes, and I can add on extra charms or feathers later if I find it too plain. I'm digging the simplicity for now.
Absolutely perfect! Here's the breakdown:
Antler tip: $5.78
Eye pins: $1.49
Beads: $6.79 (I used a coupon. Original price was $11.99)
Chain: $3.49
TOTAL: $17.55
If I had been more patient and less obsessed with these beads, I could have gotten away with this project for a little over $5.
Saturday, July 5, 2014
Porcupine Quill Necklace
Finally back from Guatemala and crafting again!
This little project I've been planning for a long time, but never made the final steps to buy supplies and make it a reality.
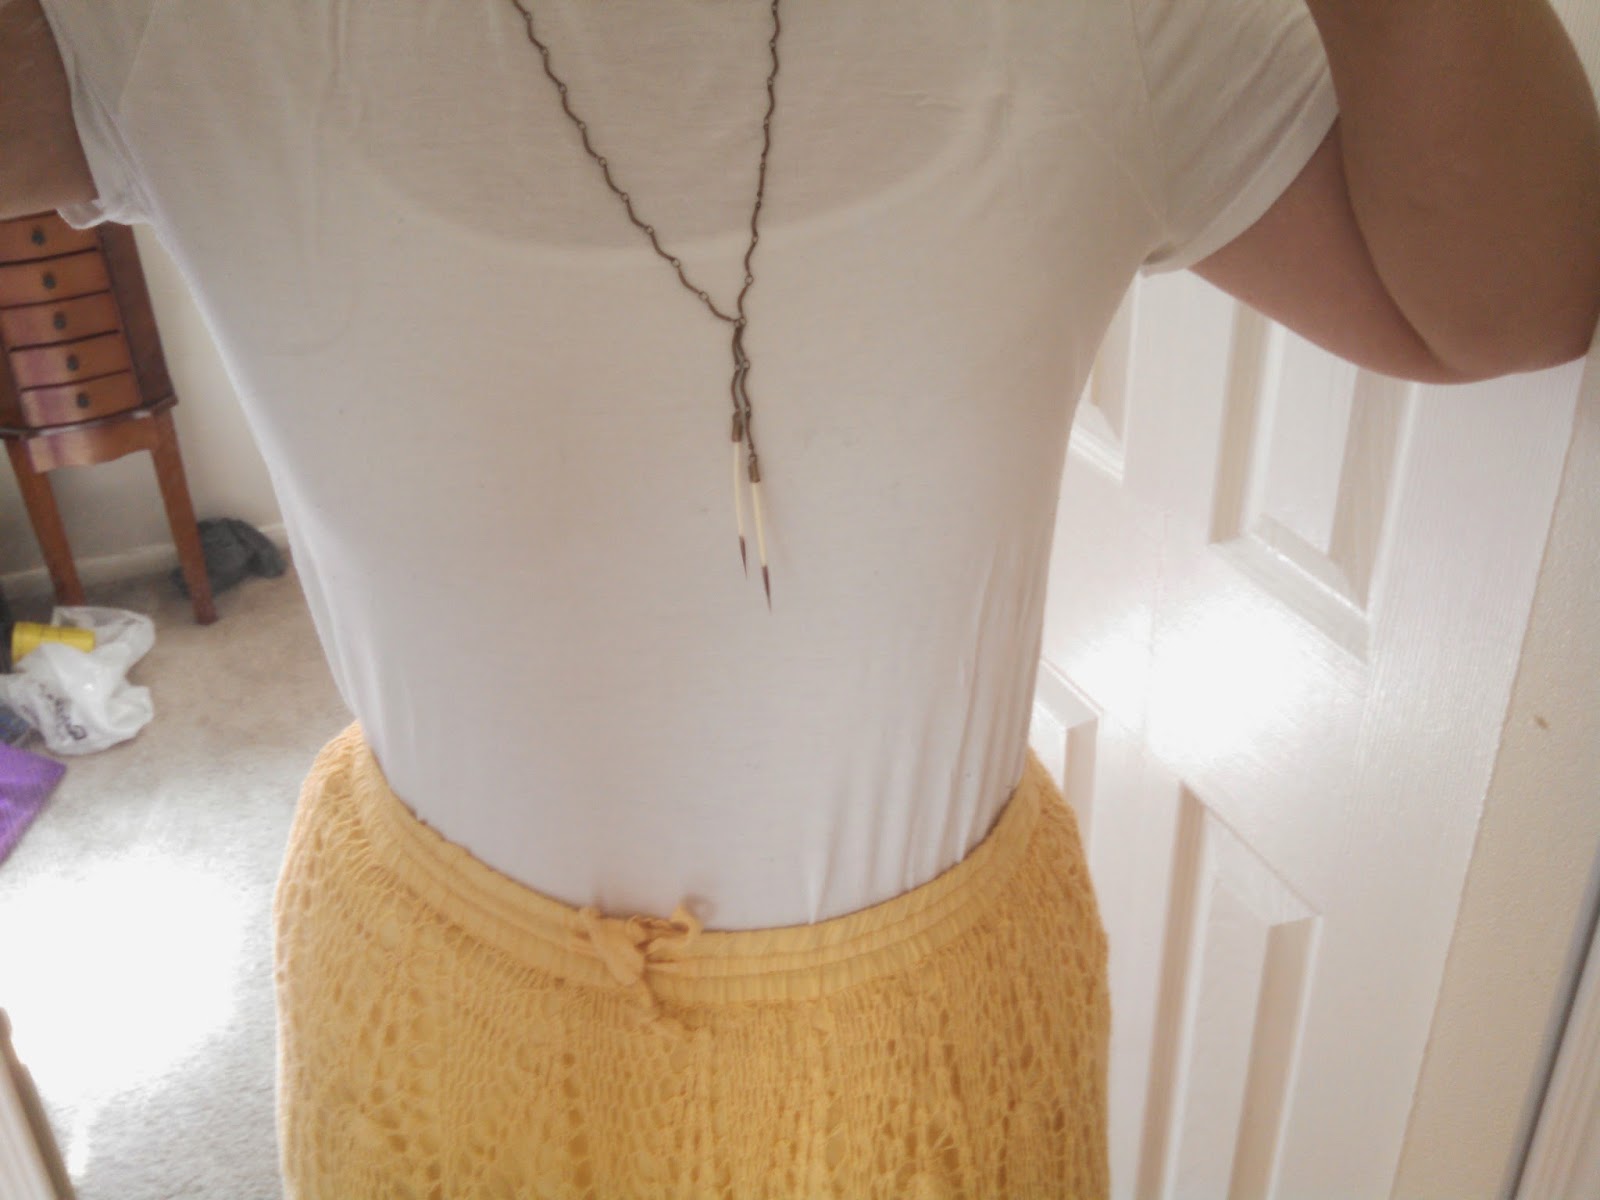
It's no secret that I love animals (duh) and I love wearing jewelry with animal flair. I have had a small collection of naturally-shed porcupine quills from a North American porcupine, Peggy Sue, for years. After clearing the project with the zoo director a couple years ago, this idea took a back seat to things like my wedding, vet school, and other small crafts. But the day has come! Here's my porcupine quill necklace:
The inspiration came from a simple necklace by K/LLER that paired a natural quill with a metal quill on a long chain. Easy enough to complete, but I put it off because I couldn't find the right metal quill for sale. Additionally, I couldn't find any tutorials on working with quills on Pinterest or by Googling.
First, let me give a small homage to Peggy Sue, the best porcupine this side of the Mississippi. She was a wonderful animal ambassador for the zoo, and when she finally passed, both zoo staff and the community mourned her. She was a favorite. Shortly before Peggy Sue left us, I collected some quills from her enclosure.
A few observations about porcupine quills:
1. Porcupines are a bit greasy, and the side of the quill that attaches to the body is often a bit rough and will need to be cleaned.
2. The opposite end has a barb that lessens the force required to penetrate skin while simultaneously making it very difficult to remove. You can read more about this feature here.
3. The quills are hollow.
I cleaned the quills and removed the barbs first. I used scissors to cut about 1/16 of an inch below the barb to ensure that I had cut off the small tapering that occurs just before the barb as well.
As far as other materials, I went to Von's and found a great chain and what I believe were labelled "tube closures." I chose a chain with a bit more detail than my inspiration piece by K/LLER.
I liked the uneven tails that were formed by crossing the chain, so I mimicked that detail by using the links of the chain itself to create the cross.
Then, I placed my trimmed quills in the tube closures and crimped them shut. I chose not to use new jump rings and instead used the small links from the chain. The jump rings I had on hand were so large that they ruined the delicate, streamlined effect of the chain and quills.
Voila! I regret putting this project off for so long. It was really easy and I love the result. Even though I couldn't find a metal quill, I really like the contrast of metal and natural porcupine. If I change my mind, I have some gold spray paint I could try to mimic the metallic quill of the K/LLER design.
The final cost/savings analysis:
- K/LLER original: $125
- Peggy Sue quills: free, but you can easily find cheap porcupine quills for sale
- Chain: $7.75
- Tube closures: $0.30
- Labor time: 30 minutes
Total: $8.05
TOTAL SAVINGS: $116.95
This little project I've been planning for a long time, but never made the final steps to buy supplies and make it a reality.
It's no secret that I love animals (duh) and I love wearing jewelry with animal flair. I have had a small collection of naturally-shed porcupine quills from a North American porcupine, Peggy Sue, for years. After clearing the project with the zoo director a couple years ago, this idea took a back seat to things like my wedding, vet school, and other small crafts. But the day has come! Here's my porcupine quill necklace:
The inspiration came from a simple necklace by K/LLER that paired a natural quill with a metal quill on a long chain. Easy enough to complete, but I put it off because I couldn't find the right metal quill for sale. Additionally, I couldn't find any tutorials on working with quills on Pinterest or by Googling.
First, let me give a small homage to Peggy Sue, the best porcupine this side of the Mississippi. She was a wonderful animal ambassador for the zoo, and when she finally passed, both zoo staff and the community mourned her. She was a favorite. Shortly before Peggy Sue left us, I collected some quills from her enclosure.
A few observations about porcupine quills:
1. Porcupines are a bit greasy, and the side of the quill that attaches to the body is often a bit rough and will need to be cleaned.
2. The opposite end has a barb that lessens the force required to penetrate skin while simultaneously making it very difficult to remove. You can read more about this feature here.
3. The quills are hollow.
I cleaned the quills and removed the barbs first. I used scissors to cut about 1/16 of an inch below the barb to ensure that I had cut off the small tapering that occurs just before the barb as well.
As far as other materials, I went to Von's and found a great chain and what I believe were labelled "tube closures." I chose a chain with a bit more detail than my inspiration piece by K/LLER.
I liked the uneven tails that were formed by crossing the chain, so I mimicked that detail by using the links of the chain itself to create the cross.
Then, I placed my trimmed quills in the tube closures and crimped them shut. I chose not to use new jump rings and instead used the small links from the chain. The jump rings I had on hand were so large that they ruined the delicate, streamlined effect of the chain and quills.
Voila! I regret putting this project off for so long. It was really easy and I love the result. Even though I couldn't find a metal quill, I really like the contrast of metal and natural porcupine. If I change my mind, I have some gold spray paint I could try to mimic the metallic quill of the K/LLER design.
The final cost/savings analysis:
- K/LLER original: $125
- Peggy Sue quills: free, but you can easily find cheap porcupine quills for sale
- Chain: $7.75
- Tube closures: $0.30
- Labor time: 30 minutes
Total: $8.05
TOTAL SAVINGS: $116.95
Subscribe to:
Posts (Atom)